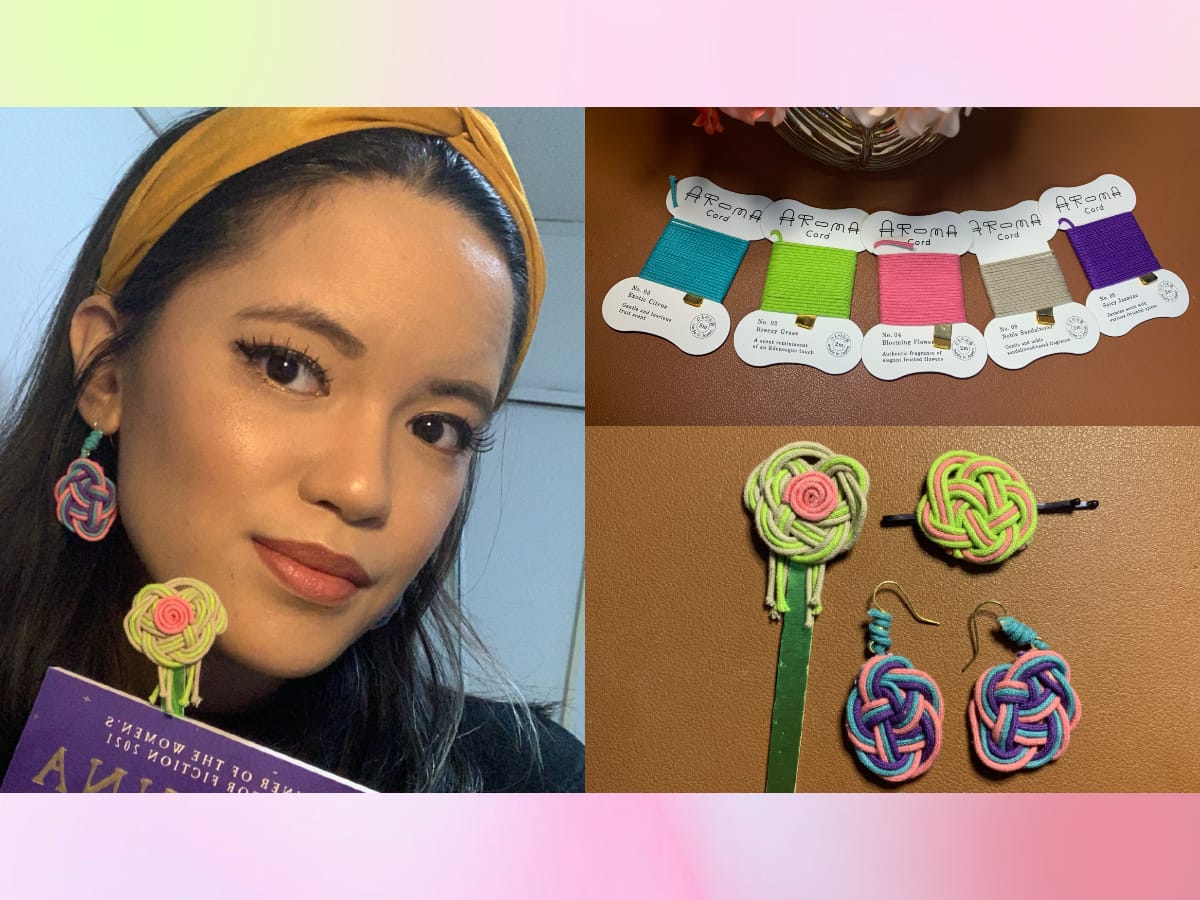
Photo by Jen Laforteza
Fashioning Japan’s ancient mizuhiki artform into modern accessories using the AROMA Cord
- Tags:
- Accessories / Aroma cord incense / Bookmark / DIY / Earrings / Grape Shop / hairpin / Incense / mizuhiki
Related Article
-
Origami Artist Turns Plants into the Most Amazing Moving Creatures
-
We Tried Haruki Nakamura’s Pop Up Penguin
-

Japanese designer invents Spidey-style wrist gadget which shoots plastic shopping bags
-

Woman’s Japanese countryside life with dogs has people thinking she’s living out Ghibli movies
-
The Amazing Pop-Up Penguin Bomb And How To Make It
-
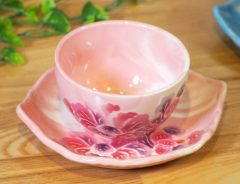
These flower-print cups and saucers are inspired by Okinawa’s traditional Bingata textile patterns

What is mizuhiki?
apple | © PIXTA
Estimated to have been around from as early as the 9th century, the decorative art form of mizuhiki (水引) has persevered over generations as a visual way to represent human benevolence in gift-giving.
The most common form of mizuhiki comes in white, red or gold strands of hardened washi wrapped around envelopes or gifts, while the art itself comes from the techniques used to beautifully tie the cords. These different tying techniques have been refined over the years, and when combined with certain colors of cords, mizuhiki can be used to express things like get-well wishes and condolences without even saying a word.
Creating mizuhiki accessories
Photo by Jen Laforteza
Aside from their usage as decorations for gifts, mizuhiki are also used to create all sorts of accessories. Once you’ve tied your cords into the mizuhiki style of your choosing, they’re really easy to adapt into all sorts of accessories you can use in day-to-day life.
For this project, we’re using the AROMA Cord incense to create mizuhiki. We’ve introduced the AROMA Cord incense in one of our articles in the past, where we also talked about other creative ways you can use the cord.
Photo by Jen Laforteza
Admittedly, despite living in Japan for over five years now, I haven’t been able to involve myself in the more traditional side of Japanese culture as much as I’d like. So when I first learned how to make the type of mizuhiki we’re using in this article, I thought it was the perfect opportunity to feel more connected to Japan. Using the AROMA Cord made it a more pleasant experience to do, because I would get a whiff of their relaxing scents the entire time I was working.
Making an ume-musubi mizuhiki
I chose the ume-musubi for my mizuhiki accessories because ume, or plum blossoms, and their more famous look alike, cherry blossoms have a special place in my heart. I first came to Japan in spring, and seeing plum blossoms and cherry blossoms blooming everywhere felt as if they were welcoming me as I started my new life in this country.
The ume-musubi can be suited for beginners, after all, I was able to do it! So let’s go ahead and learn how to make one!
Photo by Jen Laforteza
What you’ll need:
Step 1: Pick out the colors you’d like to use and cut the cord into three equal lengths
Photo by Jen Laforteza
For this step, the recommended length is about 40 to 45 centimeters for each cord (15” to 17”). Although you will have some excess cord by the end, this length will allow you to move and tie your knots easily.
Step 2: Arrange the cords into your preferred color order, and form a teardrop shape with the right hand side on top
Photo by Jen Laforteza
I’ve arranged my AROMA Cords into a pink (Blooming Flowers), blue (Exotic Citrus), and purple (Spicy Jasmine) color order. While making the mizuhiki, your cords might end up getting tangled into a different position, so it’s important to keep them in the correct order as you follow the next steps.
Once you’ve arranged them, form a teardrop shape with both sides of your cords meeting in the middle, with the right hand side on top.
Step 3: Pull either side of the cords one by one to form a smaller teardrop shape
Photo by Jen Laforteza
Place your index finger at the center part where your cords meet to keep them in place, then pull the cords on either side one by one, until you achieve a smaller tear drop shape. Pulling them one by one will help make sure that your cords retain the shape you need it to be.
Step 4: Cross over the cords on the left hand side downwards towards the middle of your teardrop
Photo by Jen Laforteza
You should end up with a shape that looks similar to a pretzel.
Step 5: Bring the cords on top downwards and over the bottom cords
Photo by Jen Laforteza
Step 6: Insert the cords from Step 5 under the bottom hole of your pretzel shape
Photo by Jen Laforteza
The next few steps are the most complicated part of making the ume-musubi, but as long as you keep track of your cords being in the correct order, you should be able to see things through.
Lift up the bottom portion of the pretzel shape and bring the cords you moved in Step 5 under and through the hole.
Step 7: Bring the cords from Step 6 up and under the middle hole of your pretzel shape
Photo by Jen Laforteza
Right now, your cords should be through the bottom hole. You want them to pass over the cords that make up the top line of the bottom hole of your pretzel. Then, similar to what you did in Step 6, you want to lift up your pretzel shape and have the cords pass under the bottom line of the top hole.
Step 8: Bring the cords from Step 7 above the very top line of your pretzel
Photo by Jen Laforteza
The hard part’s almost over! Now you want to bring the cords over the last remaining line of your pretzel, at the very top.
Step 9: Gather both left and right ends of the cords and pull until you see a rough 8-shape with two loops on top
Photo by Jen Laforteza
Step 10: Loosen the loops on top by pulling them towards the left and right sides, until you form a bow-shape
Photo by Jen Laforteza
Step 11: Pull the left and right ends of your cords one by one
Photo by Jen Laforteza
With your index finger in the middle of your “bow” to keep it in place, pull the left and right ends of your cords one by one. Then you’ll start to see a tighter version of the bow-shape from Step 10.
Step 12: Tighten all the loops of your ume-musubi by pulling on the ends or on the loops themselves
Photo by Jen Laforteza
At this step, we want to see the ume-musubi start to take a clearer shape. You have the basic loops of the ume-musubi in place now, so you want to tighten them. At first, you might need to experiment to see which loops need to be pulled to tighten up your shape, but it should be easy to figure out how to make the base ume-musubi come together. Your goal is to have it look like the image below by the end of this step.
Photo by Jen Laforteza
Step 13: Open up the middle of your ume-musubi slightly using pliers
Photo by Jen Laforteza
Step 14: Gather the left hand cords, and cut the ends if they’re not of equal lengths
Photo by Jen Laforteza
Step 15: Insert the left hand cords to the middle of your ume-musubi, and pull it through halfway until you form a loop
Photo by Jen Laforteza
Step 16: Gather the right hand cords, pull them above and into the loop from Step 15
Photo by Jen Laforteza
Step 17: Pull the cords from Step 16 all the way through until you form a loop of the same size as the rest of your ume-musubi
Photo by Jen Laforteza
Step 18: Pull the ends of the left hand cords from Step 14 one by one until you form a loop of the same size as the rest of your ume-musubi
Photo by Jen Laforteza
Last step: Cut the excess cord at the back of your ume-musubi, glue the ends and keep in place with clips until the glue has dried
Photo by Jen Laforteza
And you’re finally done!
Now we’ll show you the different ways you can use your newly formed ume-musubi to create your own custom accessories!
Ideas for mizuhiki accessories
Mizuhiki hairpin
Photo by Jen Laforteza
A hairpin is one of the easiest things you can decorate with mizuhiki. All you need is a plain hairpin, your mizuhiki, and optionally, a small piece of paper. You can glue the mizuhiki directly on to the hairpin (while being careful that you don’t glue the hairpin shut itself), or you can use the small piece of paper as a backing to hold the mizuhiki in place, like in the image below.
Photo by Jen Laforteza
Mizuhiki earrings
Photo by Jen Laforteza
For this example, you’ll need earring hooks that have a hole at the bottom you can insert a mizuhiki cord into. Instead of cutting off all the excess cord lengths in the mizuhiki we made earlier, for the earrings, you’ll want to leave one cord uncut.
Photo by Jen Laforteza
Insert this remaining cord to the hole of the earring hook, and secure it with a tight knot. You can then cut off the cord or wrap it around and glue it to the bottom half of the earring hook if you’d like.
Photo by Jen Laforteza
Mizuhiki bookmarks
Photo by Jen Laforteza
You will need a popsicle stick or a wooden stir stick and optionally, a type of colored paper. Wrap the colored paper around the stick, cut it to follow the shape and size of the stick, then simply glue the paper to the stick.
For this example, I left a bit of the excess cord length and also formed a spiral with the AROMA Cord and glue. I then glued this spiral to the middle of my mizuhiki as a bit of extra design. You can then attach the completed mizuhiki to one end of your popsicle or stir stick.
So there you have it! You’ve learned how to make an ume-musubi mizuhiki and how to fashion it into three different types of accessories. We hope you enjoyed learning more about this ancient Japanese art form!
If you want to use the AROMA Cord for your mizuhiki, you can purchase them within Japan and abroad through grape SHOP. The AROMA Cord is the perfect material to use if you’re making mizuhiki accessories as a gift because they’re not only lovely to look at, they’ll smell amazing too.
(We use WorldShopping Global. The grape SHOP page is in Japanese, but if you see the WorldShopping widget appear at the bottom of the page, that product can be shipped overseas)